Building an energy saving AC controller with 0 prior knowledge.
The very week after I attempted my OSEP exam, I got contacted by an acquaintance that knew I did computer stuff and asked if I could build a device that would stop the AC if there wasn’t anybody in the room, with a 2 week deadline and for less than $40.
I had 0 knowledge of electronics. I had never touched a jumper wire or a breadboard in my life. I did not know how an AC worked or how to determine the occupancy of a room. I should’ve said no.
But.

I said yes. Or that at least I’ll give it a good go.
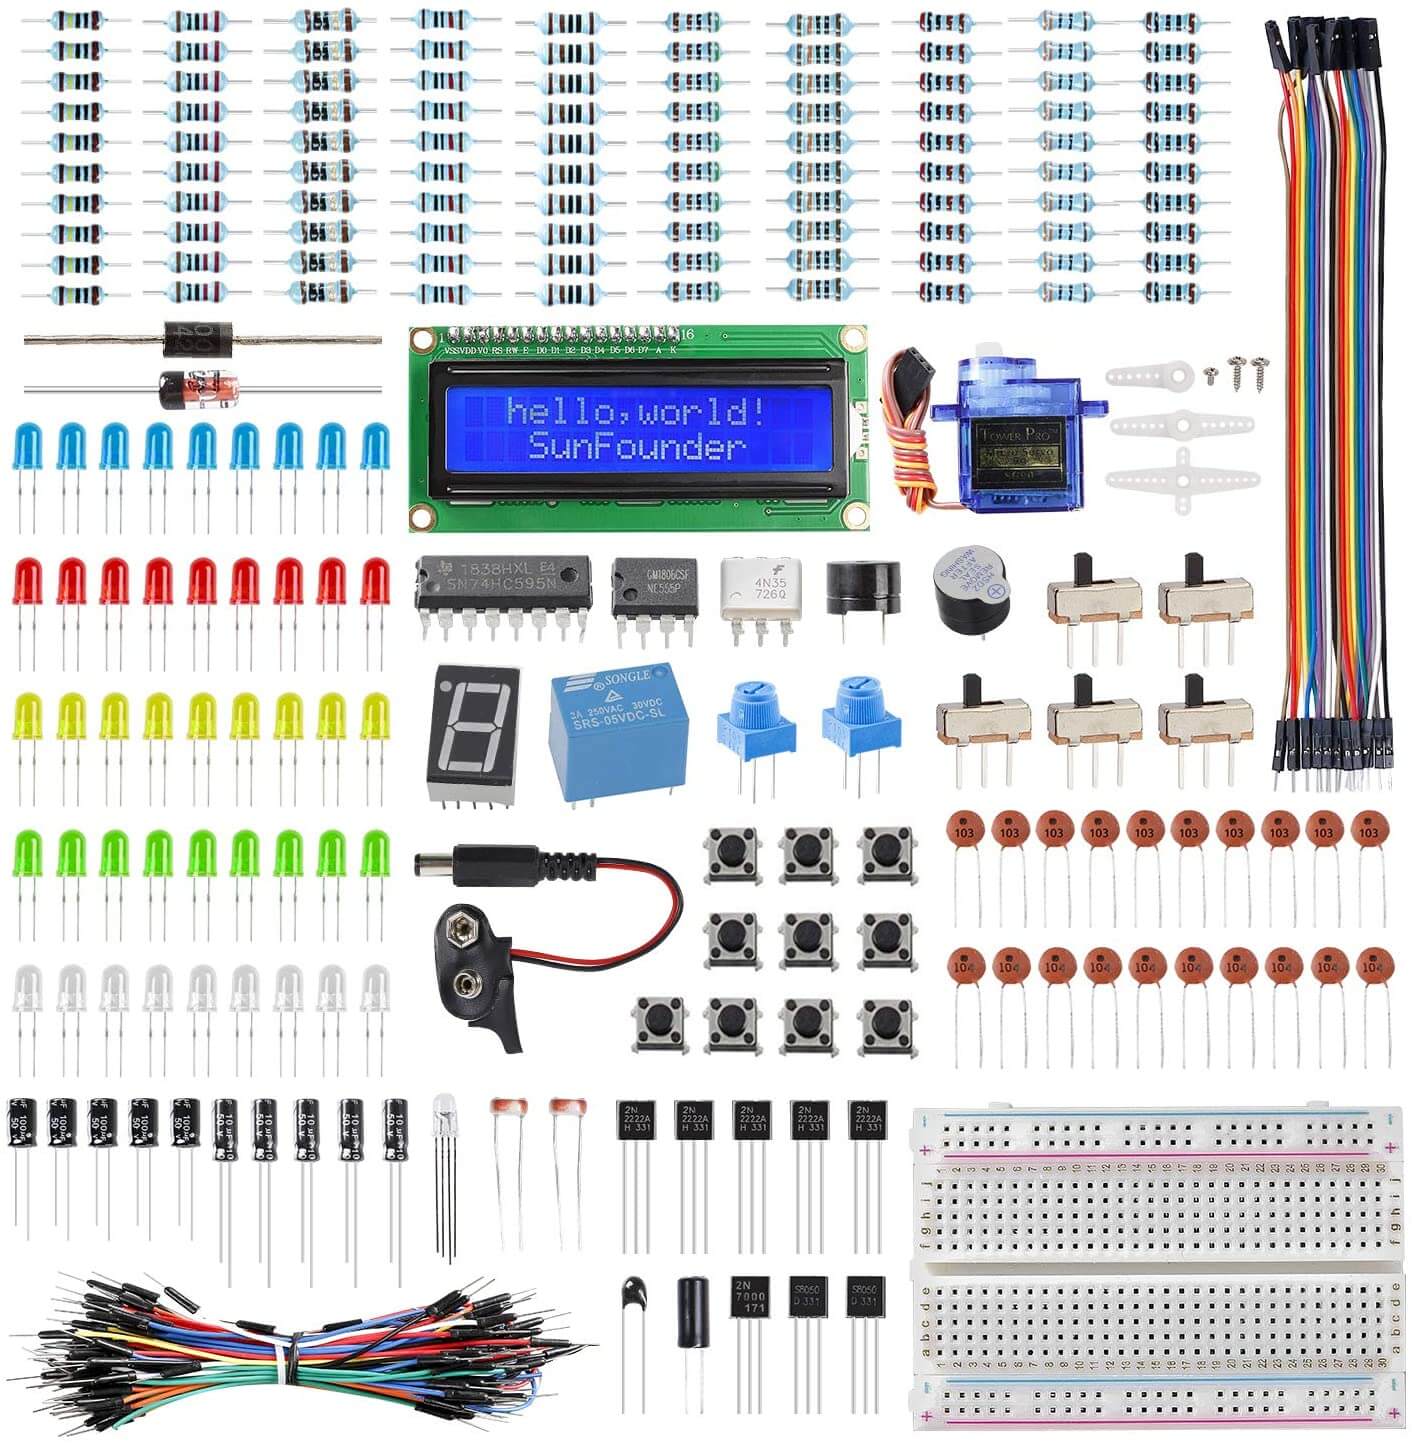
Starter Pack
I had an electronics starter kit that I won at a CTF competition some years prior. One of those things.
I figured that would be enough to get me started. I did the first few demo projects that came with the kit to get a rough idea of which pins did what and how they interacted with external sensors. I made a lot of mistakes here, including silly ones such as not grounding the sensors and not knowing how to read simple schematics, but after a few days I had a rough idea of how things worked so I decided to start inventing.
Occupancy Detection
The first issue was how to detect if a room was occupied or not. My first idea was to use a camera and some machine learning algorithm to detect people, but that would’ve been too expensive and demanding.
After some more thinking and research I decided to rely on a motion detector PIR instead under the simple assumption that if people were in the room, they would be moving around and activating the sensor, right?
So far the logic is: If there is no movement, send an IR signal to turn the AC off.
I hook up the PIR and use some code from github with some additional tweaks to get the sensitivity just right. The sensor is very sensitive and is able to pick even small hand movements so that is a big plus. I can just assign a 30 minute or so generous timer to account for people showering or not being very active.
Infrared
At this point, the logic was: If there is no movement for 30 minutes, send an IR signal to turn the AC off. Else, reset loop to the start of the 30 minutes.
All I needed was to send the IR signal to turn off the AC. The started kit I had also came with an IR blaster, so I figured this part would be simple and there would be a library with all the codes required to control an AC unit. I asked the client what AC brand he had, and they replied with a cheap brand that was manufactured in Greece in the early 2000s, had gone bankrupt since and had virtually no documentation available. The libraries I had hoped to use did not feature it. I would have to do it manually.
First I would have to capture the request, and for that I would have to build a device for it. Thankfully the hardware wasn’t too difficult, just an IR sensor tied to an arduino board. The real issue was the software. Every IR device works via IR signals which are just long lines of digits. TVs and such use fairly short lines (50 characters). ACs use much longer ones, from 100 to 300 characters or more. The code I was trying to run was configured to capture such long requests. I tried a lot of existing code and wrote some of mine, but with little success. Eventually I discovered the amazing AnalysIR project and their receiver code available here:
https://gist.github.com/deividsoncs/d14ffa51b509433395fc376e18296c04
It is also avoidable on my project repo here:
https://github.com/robsware/Timed-IR-AC-controller
With this code in tow I was able to read much longer IR codes in raw format instead of hex. I tried using hex at first but I think my IR receiver was not sensitive enough for it while raw allowed me some wiggle room. The codes usually end up looking like this:
(101) 6592, -7620, 600, -3432, 604, -3432, 628, -3408, 624, -3408, 632, -3404, 604, -1432, 604, -3432, 628, -1380, 604, -1432, 628, -1404, 608, -1432, 604, -1428, 628, -1404, 636, -3404, 628, -1404, 632, -3532, 600, -3408, 628, -1408, 628, -3404, 628, -3408, 628, -1408, 628, -3408, 628, -1404, 632, -1380, 628, -1408, 624, -3408, 628, -1408, 628, -1404, 608, -3428, 632, -1404, 632, -3404, 632, -3388, 628, -1404, 632, -3404, 628, -1408, 632, -3404, 628, -1404, 632, -3404, 608, -1428, 632, -1360, 628, -3408, 628, -1404, 632, -3404, 656, -1376, 636, -3404, 628, -1404, 636, -3400, 632, -3332, 628, -7432, 632
The first week had almost passed, so I used the weekend for a trip to the client’s facility and got one of their AC remotes. I made an impromptu dark room by covering the sensor with a blanket and shot the remote at it a few times to have as little light interference as possible. The code was on the short side, at just about 130 characters. This meant that my odds of getting it right were substantially better, and they had to be because I had a week left and no way to test it.
After some more code writing and debugging, I assembled my current contraption, which was an IR blaster, a LED, a motion sensor and a transistor and resistor necessary for the IR blaster. I thought I was good to go, with 3 days left until the weekend when I would get to test it. In the meantime I was just testing it on my own AC which used codes available in a library and everything seemed to work fine.
Night time
One day I worked late into the night on the project and did not unplug it as I went to bed, only to wake up 30 minutes later as the AC beeped from receiving an off signal. I found it annoying but assumed it’s just something you have to put up with when you go to bed, a final beep to turn the AC off.
But it kept beeping.
Every 30 minutes, when the motion sensor loop would end, the AC would receive an off signal and beep in acknowledgement. I realised this would be a big problem.
After unplugging it and catching up on some sleep, I kept thinking how to tackle this. After some pondering, I figured that this problem only occurs when people are asleep for prolonged periods of time. So likely either at night or with the shutters pulled down. So the logical solution would be a light sensor!
Once again, my kit had one. Wiring was surprisingly simple and the code didn’t take me too long to write and add to the rest of the program so I was done by late night on Thursday. The logic was simple: Once the photosensor would detect a low amount of light in the room, it would suspend the motion detection loop. I let the arduino plugged in and I heard no beeps that night. Excellent.
I spent Friday doing more tests and fixing bugs in preparation for Saturday when I would get to test it. I was pretty exhausted at this point, both from my OSEP exam and from the fact I did all this quick learning and development while having a demanding full time job so I hoped for the best.
The Test
I got to the client and pulled out my Thinkpad and the hobbled together Arduino. For the purpose of testing, the motion loop was running every 10 seconds. I plugged everything in, stopped moving and.. It worked! The AC gave up the acknowledging beep and turned off. I was so happy that something I wrote worked on the first try and the client was equally delighted.
And then they asked about the bill of materials.
Simple electronic components are surprisingly cheap, but the issue was the arduino, which alone was about $30. Add the $9 power adapter to that and I’m already past the budget. At this point I had to get a bit unethical and start looking up some bootleg arduino clones that would ship quickly in Europe. I didn’t have the knowledge or tooling to design my own dev board so this would have to do. I found a supplier who sold them for about $15 a piece, so the final bill of materials would be:
Bootleg arduino: $15
Power adapter: $9
Breadboard: $1
Resistor + transistor + IR blaster + photosensor + motion sensor: $5
Jumper wires: $2

Shipping: $3
For a grand total of $35. $5 under the limit, but hopefully the costs would go down a bit when ordering in bulk - the client needed about 30 of them.
The Code
I made a repo with all the code used for this project, as well as CAD files and reference pictures, which should hopefully be enough to be able to replicate what I did. Good luck if you decide to embark on a similar project.
https://github.com/robsware/Timed-IR-AC-controller
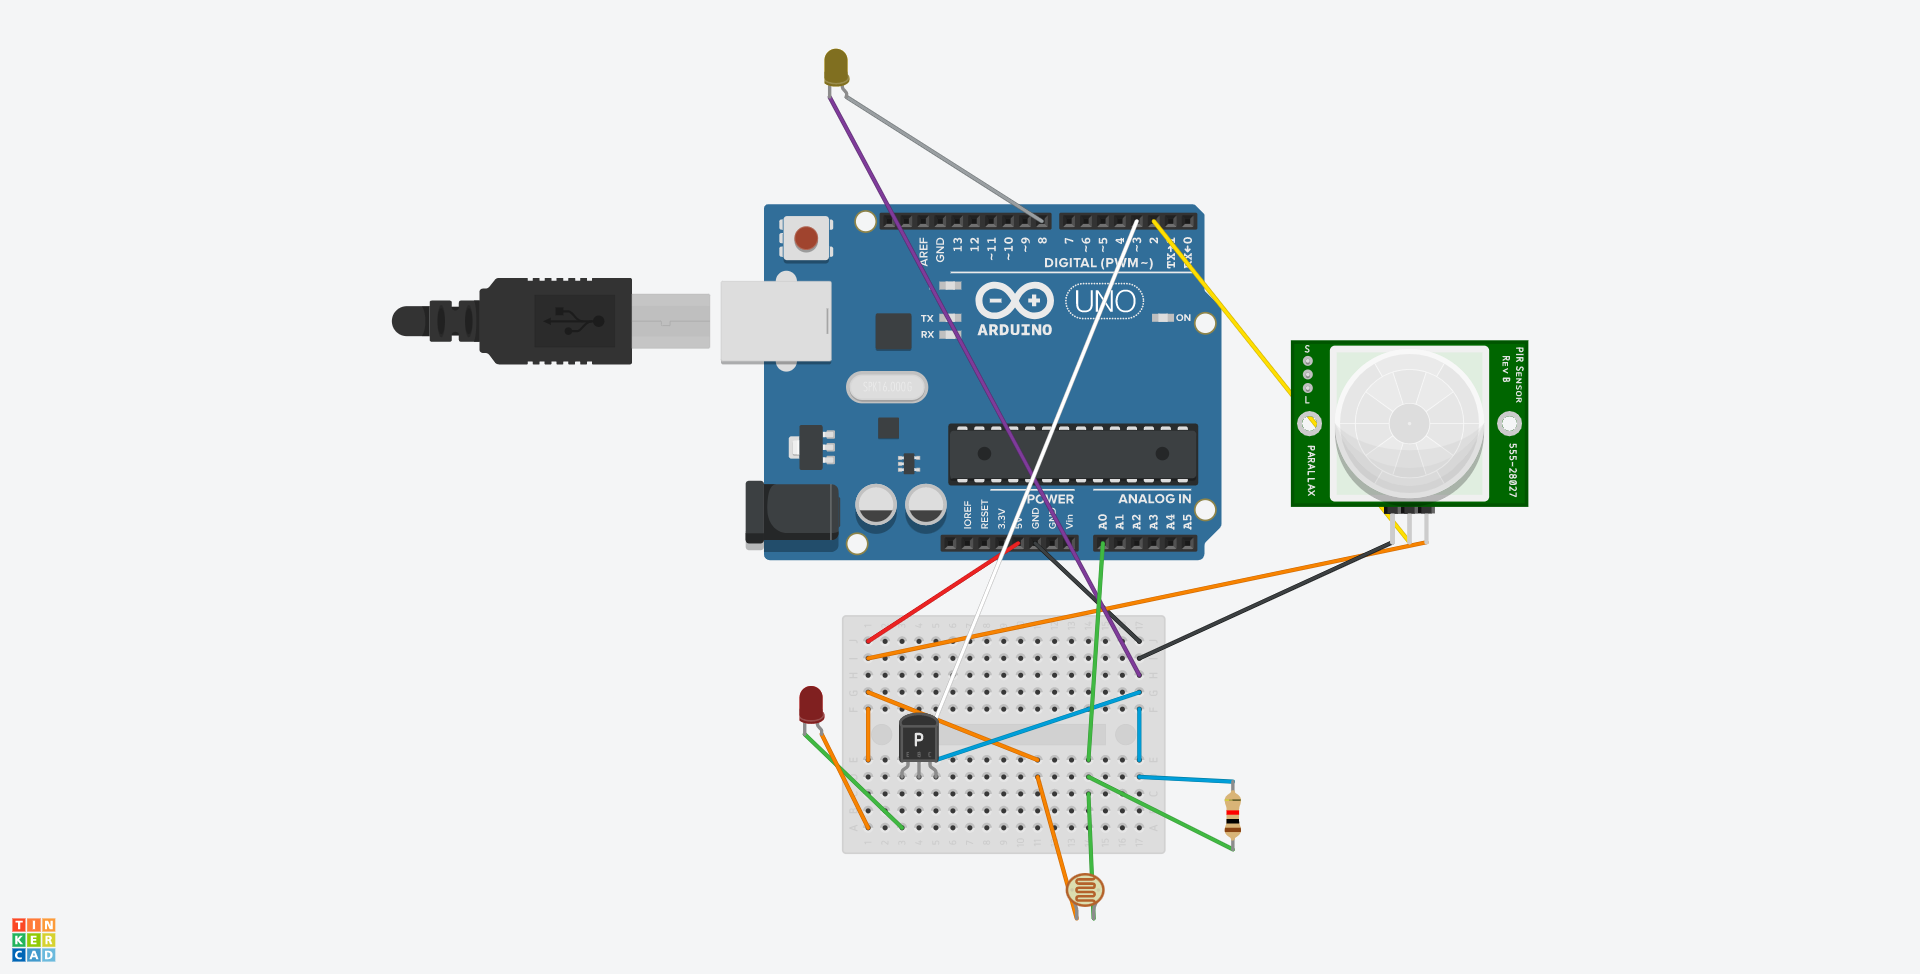
Final result:
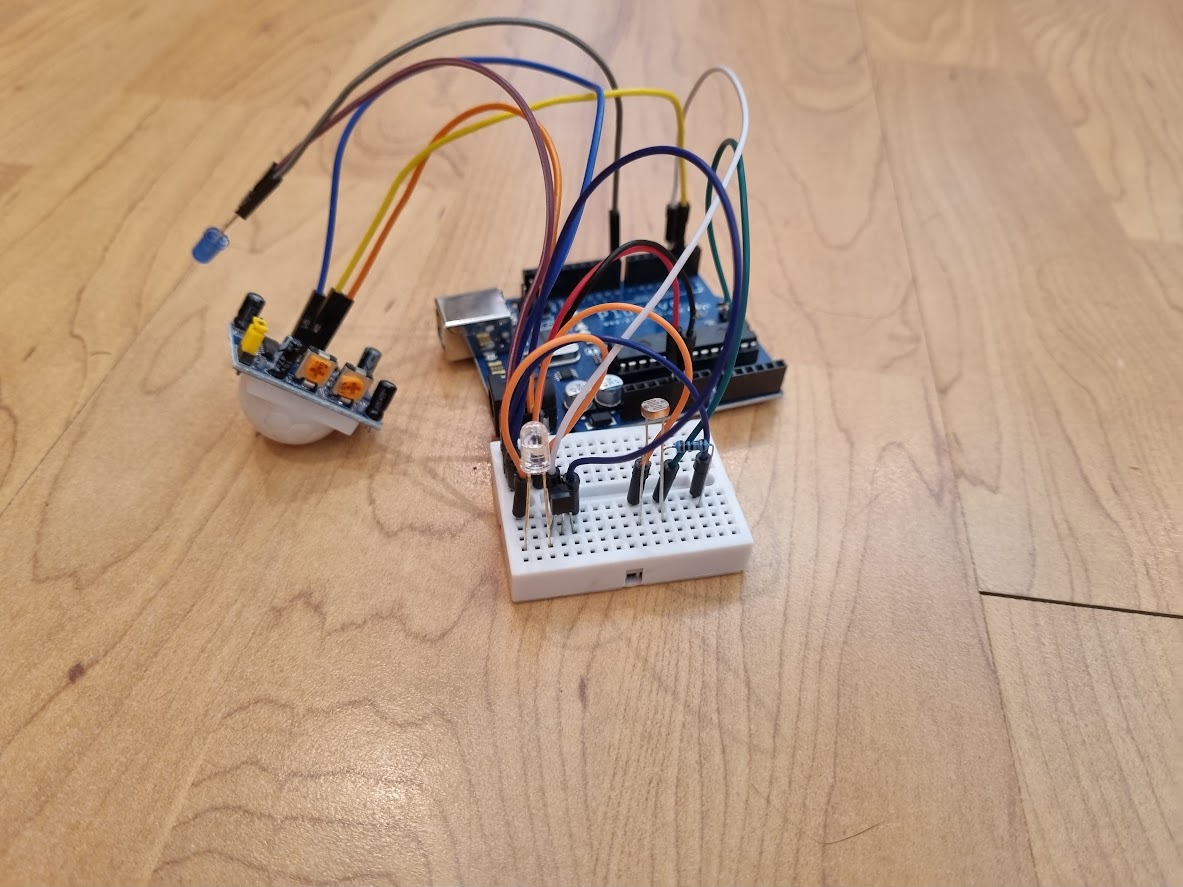
The wiring:
The code:
#include <IRremote.h> // >v3.0.0

#define PIN_SEND 3

#define RAW_DATA_LEN 350
#define JVCPower 0x80C0
IRsend irsend;

#define movementDetection  HIGH

#define LEDon              HIGH
#define LEDoff             LOW

#define enabled            true
#define disabled           false

//*********************************************************************
const byte heartbeatLED  = 13;
const byte  led          = 8;
const byte  pir          = 2;

bool autoOffFlag         = disabled;

byte lastPIRstate        = !movementDetection;
byte val;
byte state               = 0;
byte LEDstate            = LEDoff;


int sensorPin = A0; // select the input pin for LDR
int sensorValue = 0; // variable to store the value coming from the sensor


//Timing stuff
const unsigned long timeoutDuration   = 10000;            //10 seconds for testing
//const unsigned long timeoutDuration = 15 * 60 * 1000ul; //15 minutes

unsigned long heartbeatMillis;
unsigned long switchMillis;
unsigned long autoMillis;

//*********************************************************************
void setup()
{
  pinMode(heartbeatLED, OUTPUT);

  //turn the light OFF
  digitalWrite(led, LEDoff);
  pinMode(led, OUTPUT);

  pinMode(pir, INPUT);
  IrSender.begin(PIN_SEND); // Initializes IR sender
  Serial.begin(9600);


} //END of setup()

//*********************************************************************
void loop()
{
  sensorValue = analogRead(sensorPin); // read the value from the sensor
  Serial.println(sensorValue); //prints the values coming from the sensor on the screen

  delay(500);


      //***********************
      //time to toggle the heartbeatLED ?
      if (millis() - heartbeatMillis >= 500)
      {
        //restart the TIMER
        heartbeatMillis = millis();

        //toggle the LED
        digitalWrite(heartbeatLED, !digitalRead(heartbeatLED));

      }

      //***********************
      //time to check the switches ?
      if (millis() - switchMillis >= 50)
      {
        //restart the TIMER
        switchMillis = millis();


        checkSwitches();
      }

      //***********************
      //if enabled, has the TIMER reached the timeout interval ?
      if (autoOffFlag == enabled && millis() - autoMillis >= timeoutDuration)
      {
        //disable the TIMER
        autoOffFlag = disabled;

        //toggle the LED light
        LEDstate = LEDoff;


        //turn the light OFF
        digitalWrite(led, LEDoff);

        //send IR signal
       uint16_t irSignal[115] = {6592 ... 632};


        if (sensorValue > 800)
        {
          IrSender.sendRaw(irSignal, 279 / sizeof(irSignal[0]), 38);
          Serial.println(F("AC Switched Off"));
        }
      }


} //END of loop()


//*********************************************************************
void checkSwitches()
{
  //*****************************************    PIR
  //
  byte state = digitalRead(pir);


  //***********************
  //has the PIR changed state ?
  if (lastPIRstate != state)
  {
    //update to the new state
    lastPIRstate = state;

    //************
    //has the PIR detected movement ?
    if (state == movementDetection)
    {
      //toggle the LED light
      LEDstate = LEDon;

      digitalWrite(led, LEDstate);

      if (state == movementDetection)
      {
        //enable the TIMER
        autoOffFlag = enabled;

        //start the TIMER
        autoMillis = millis();


      }

      else
      {
        //disable the TIMER but keep the LED on
        digitalWrite(led, LEDon);
        autoOffFlag = disabled;


      }

    }

  } //END of  if (lastPIRstate != state)


} //END of  checkSwitches()

//*********************************************************************
I hope you’ve learned something from this and remember to keep exploring!